You already know how to use images as links. An imagemap is dividing an image into areas, each of which can be used as a link. For example, you can have an image of the United States, and by sectioning the map, you can make each state it's own link.
Imagemaps can be implemented either client-side or server-side; the former meaning the viewer's computer does the work. Client-side is faster (with server-side, data has to be sent back and forth over the internet several times). Server-side image maps give you, the webmaster, more control.
When the mouse passes over the screen, it's X and Y coordinates can be determined. If an image is positioned on a page, the mouse's X and Y coordinates can be determined relative to the image location. You can tell the computer that whenever the mouse is over a certain area of the image, link to a specified site.
The areas can take three shapes: rectangular, circular or irregular polygon. As you can guess, to fully define a rectangular area, you need only identify the upper-left and lower-right corners. To define a circular area, you need to describe the center and radius. To define a polygon, you need to label the X and Y coordinates of each point that makes the polygon. (try it)
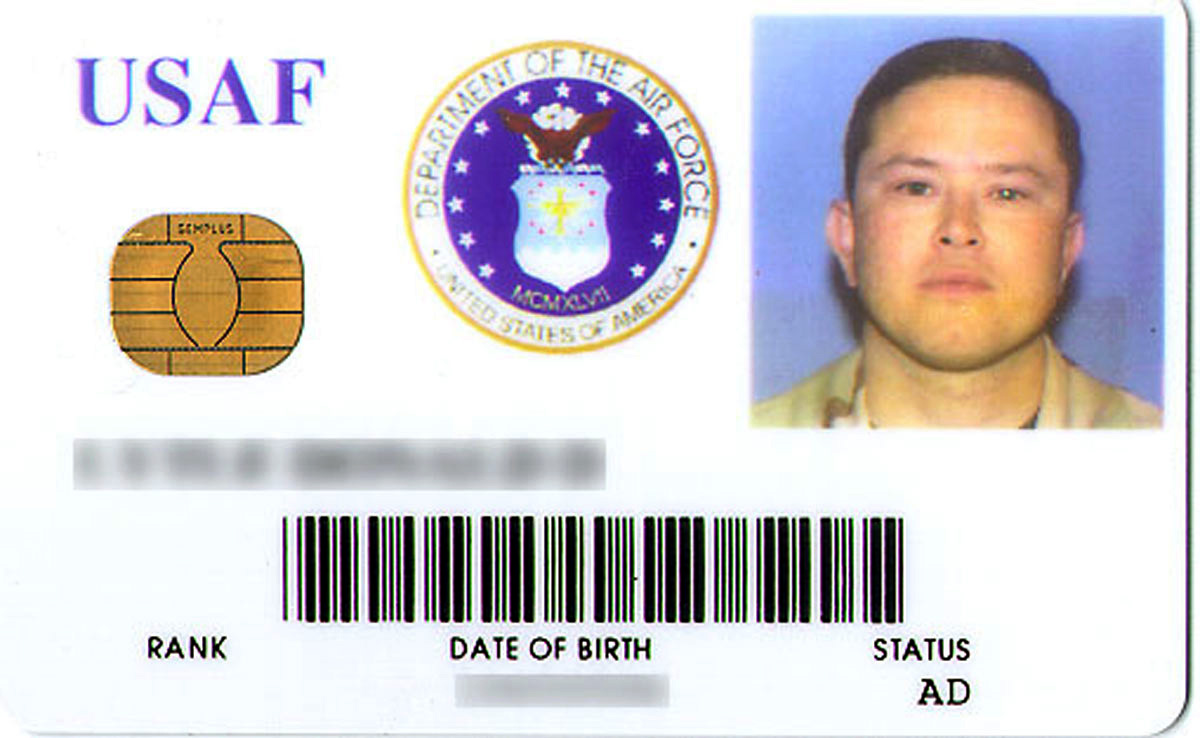
Let's try it. Note the DoD's old ID card shown on the left. Suppose I want to make the picture one link, the Department of the Air Force logo another link, and the gold seal another. The picture lends itself to a rectangular area; the logo favors a circular area; and (even though a rectangle will suffice, since we want to learn), I will use a polygon for the gold seal.
If you have a graphics program, or a sophisticated HTML editor, you can find the coordinates easily. Trial and error would probably take about an hour or so. For your convenience, I included a JavaScript script in Lesson 25 that can be used to find coordinates.
I discovered the rectangular coordinates around the picture were at (315,5) for the upper-left-hand corner, and (485,180) for the lower-right-hand corner. So, for the rectangular area around the picture, I use 'coords="315,5,485,180"'. For the circular area around the Air Force logo, I found the coordinates of the center to be (235,80), and the radius to be 65, thus I use 'coords="235,80,65"'. Lastly, I found the coordinates of the irregular shaped polygon around the gold seal to be (45,105), (60,90), (110,90), (125,105), (125,140), (110,155), (60,155) and (45,140), so I use 'coords="45,105, 60,90, 110,90, 125,105, 125,140, 110,155, 60,155, 45,140"'. Note that these are coordinates of the image, not the page. The imagemap will tie the coordinates to the image wherever the image appears on the page.
Next, we need to specify a map, give it a name, and specify the areas. I add the Map tag anywhere before the Img tag it will serve. Within the Img tag, I add a Usemap attribute. For example, to use the image above and its map, type:
<area shape="rect" coords="315,5,485,180" href="#bottom">
<area shape="circle" coords="235,80,65" href="#next">
<area shape="poly" coords="45,105, 60,90, 110,90, 125,105, 125,140, 110,155, 60,155, 45,140" href="#top">
</map>
<img src="idcard.jpg" width="500" align="left" border=0 usemap="#idcard"
style="margin-right:0.1in">
You can have as many of each kind of area as you need in each map. You can have only one map per image, but you can have multiple images using the same map (although it is hard to imagine a situation where it would be practical).
Remember, the coordinates shown on the map relate to the edges of the image, not the edges of the web page. The image can be placed anywhere, and the map coordinates should still work. You can add a margin or border to the image, and the map coordinates will still work, but if you add padding, the coordinates will not work.
What would you add to the Map above to put a rectangular area around the letters "USAF" that links to the Air Force home page? (Hint: Go here first.)
- In this lesson, we learned about these HTML tags:
- <map> and </map>
- <area> and </area>
- <img usemap="">
